
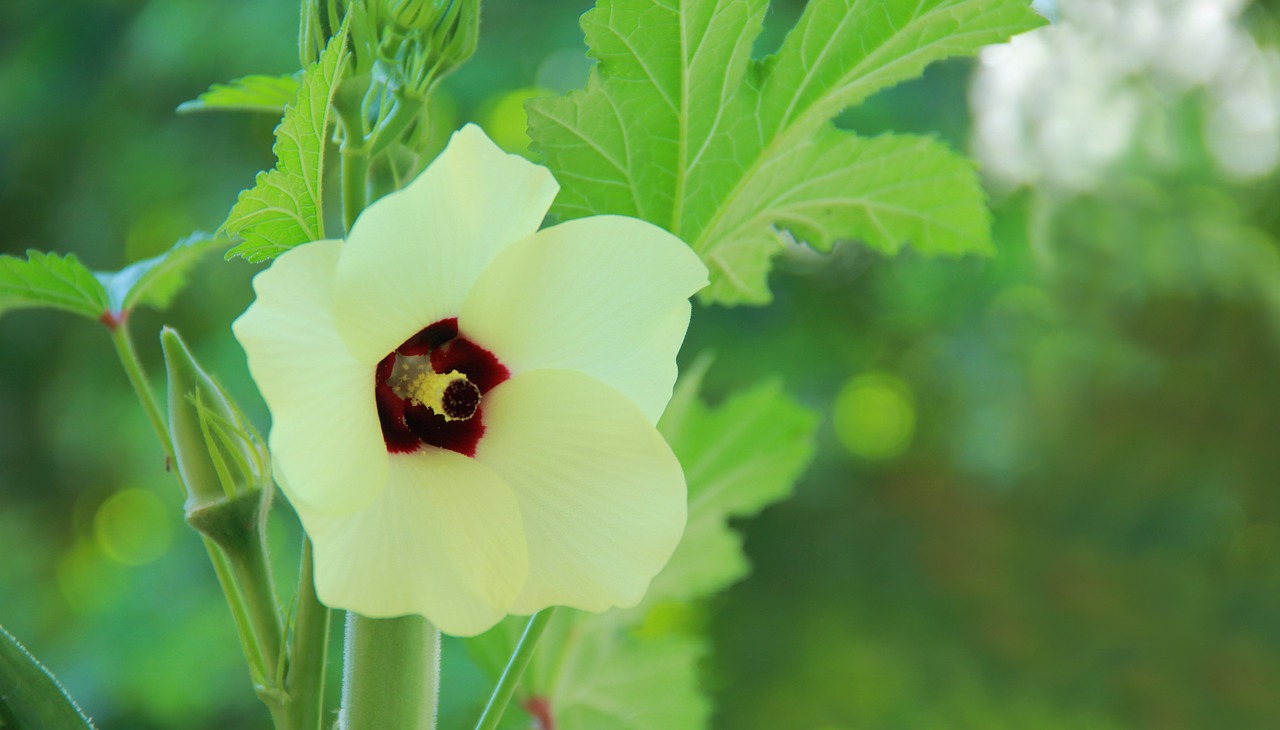
Okra, scientifically known as Abelmoschus esculentus, is a warm-season vegetable renowned for its edible green pods. With its origins in Africa, this plant thrives in hot climates and is a staple in Southern cuisine. Cultivating okra can be a rewarding experience for any gardener, whether you’re a seasoned expert or a novice enthusiast. Below is a comprehensive guide to help you successfully grow okra in your own backyard.
10 Tips In Growing Okra
1. Choosing the Right Variety
Selecting the appropriate okra variety is crucial for a successful harvest. Varieties like ‘Clemson Spineless’ and ‘Annie Oakley II’ are popular choices due to their high yields and disease resistance. Consider factors such as your local climate, available space, and preferred pod size when choosing a variety that suits your needs.
When choosing an okra variety, it’s important to consider your local climate and growing conditions. Some varieties perform better in hot, humid climates, while others are more tolerant of cooler temperatures. Additionally, consider the size and texture of the pods you prefer, as okra varieties can vary in these characteristics. By selecting the right variety for your specific conditions and preferences, you can maximize your chances of a successful harvest.
2. Selecting the Planting Site
Okra thrives in full sunlight, so choose a planting site that receives at least 6 to 8 hours of direct sunlight per day. Ensure the soil is well-draining, as okra does not tolerate waterlogged conditions. Additionally, avoid planting okra in areas prone to strong winds, as the tall plants may topple over.
When selecting a planting site for okra, it’s essential to consider the plant’s requirements for sunlight, soil drainage, and protection from wind. Okra is a warm-season crop that requires full sunlight to thrive, so choose a location that receives ample sunlight throughout the day. Additionally, okra prefers well-draining soil, as waterlogged conditions can lead to root rot and other problems. Avoid planting okra in low-lying areas where water tends to collect, and consider amending heavy clay soils with organic matter to improve drainage.
3. Preparing the Soil
Prepare the soil before planting by loosening it to a depth of at least 8 to 12 inches. Incorporate organic matter such as compost or aged manure to improve soil fertility and structure. Aim for a soil pH between 6.0 and 6.8, as okra prefers slightly acidic to neutral soil conditions.
Before planting okra seeds or seedlings, it’s essential to prepare the soil properly to provide the best growing conditions for the plants. Okra performs best in loose, well-draining soil with good fertility, so take the time to amend your soil as needed. Incorporating organic matter such as compost or aged manure can improve soil structure and fertility, providing essential nutrients for healthy plant growth. Additionally, testing the soil pH can help ensure optimal growing conditions for okra, as the plants prefer slightly acidic to neutral soil. Amend the soil as necessary to achieve a pH between 6.0 and 6.8 before planting.
4. Planting Okra Seeds or Seedlings
Okra can be grown from seeds or transplanted seedlings, depending on your preference and the length of your growing season. If starting from seeds, sow them directly into the garden after the danger of frost has passed and the soil has warmed to at least 65°F (18°C). Plant seeds 1 inch deep and space them 12 to 18 inches apart in rows spaced 3 feet apart.
When planting okra seeds or seedlings, timing is essential to ensure optimal growth and productivity. Okra is a warm-season crop that thrives in temperatures above 65°F (18°C), so wait until all danger of frost has passed before planting. If starting from seeds, sow them directly into the garden at the appropriate time for your region. Plant the seeds 1 inch deep and space them 12 to 18 inches apart in rows spaced 3 feet apart to allow room for the plants to spread as they grow.
5. Providing Adequate Water
Okra requires regular watering, especially during dry periods, to ensure healthy growth and abundant pod production. Water the plants deeply, providing enough moisture to penetrate the root zone. Avoid overhead watering, as wet foliage can increase the risk of fungal diseases.
Proper watering is essential for the health and productivity of okra plants, particularly during the hot summer months when water needs are highest. Water the plants deeply and consistently, ensuring that the soil remains evenly moist but not waterlogged. Inconsistent watering can lead to issues such as blossom end rot and poor pod development, so aim to provide a steady supply of moisture throughout the growing season. Avoid overhead watering whenever possible, as wet foliage can promote the development of fungal diseases. Instead, use a soaker hose or drip irrigation system to deliver water directly to the base of the plants, minimizing water waste and disease risk.
6. Mulching Around Plants
Applying a layer of organic mulch around okra plants can help conserve soil moisture, suppress weeds, and regulate soil temperature. Use materials such as straw, shredded leaves, or grass clippings, and apply the mulch to a depth of 2 to 3 inches. Avoid placing mulch directly against the stems of the plants to prevent rot and disease.
Mulching around okra plants is an excellent way to improve soil moisture retention, suppress weeds, and promote overall plant health. Organic mulches such as straw, shredded leaves, or grass clippings can help conserve soil moisture by reducing evaporation from the soil surface. Additionally, mulch helps to regulate soil temperature, keeping the roots cool during hot weather and insulating them during cooler periods. Apply a layer of mulch around okra plants to a depth of 2 to 3 inches, taking care to leave a small gap between the mulch and the base of the stems to prevent rot and disease.
7. Fertilizing Okra Plants
Okra plants benefit from regular fertilization to support healthy growth and abundant pod production. Apply a balanced fertilizer, such as 10-10-10, at planting time and again when the plants begin to flower. Avoid over-fertilizing, as excessive nitrogen can promote lush foliage growth at the expense of pod development.
Fertilizing okra plants is essential for providing the nutrients they need to thrive and produce a bountiful harvest. Apply a balanced fertilizer, such as 10-10-10, at planting time to provide essential nutrients for early growth. As the plants begin to flower, apply fertilizer again to support pod development and continued growth. Avoid over-fertilizing okra, particularly with nitrogen-rich fertilizers, as this can lead to excessive foliage growth at the expense of pod production. Instead, aim for a balanced approach to fertilization, providing the nutrients needed for healthy plant growth and abundant harvests.
8. Supporting Tall Plants
Okra plants can grow quite tall, reaching heights of 3 to 6 feet or more, depending on the variety. Providing support for tall plants can help prevent them from bending or breaking under the weight of heavy pods and foliage. Use stakes or a trellis to support individual plants, or plant okra in rows and use a string or wire support system to keep the plants upright.
Supporting tall okra plants is essential for preventing them from bending or breaking under the weight of heavy pods and foliage. Depending on the variety, okra plants can reach heights of 3 to 6 feet or more, so providing adequate support is crucial for maintaining plant health and productivity. Use stakes or a trellis to support individual plants, driving the stakes into the ground near the base of each plant and tying the stems to the stakes as they grow. Alternatively, plant okra in rows and install a string or wire support system between stakes to keep the plants upright and stable.
9. Harvesting Okra Pods
Okra pods are ready to harvest when they are 2 to 4 inches long and still tender. Harvest pods regularly to encourage continued production throughout the growing season. Use a sharp knife or garden shears to cut the pods from the plant, taking care not to damage the stems or surrounding foliage.
Harvesting okra pods at the right time is essential for ensuring optimal flavor and tenderness. Pods are typically ready to harvest when they are 2 to 4 inches long and still tender, usually about 4 to 6 days after flowering. Check plants regularly for mature pods, as they can quickly become tough and fibrous if left on the plant too long. Use a sharp knife or garden shears to cut the pods from the plant, taking care not to damage the stems or surrounding foliage. Harvest pods regularly throughout the growing season to encourage continued production and ensure a steady supply of fresh okra for your kitchen.
10. Managing Pests and Diseases
Okra is relatively resistant to pests and diseases, but occasional problems may arise, particularly in warm, humid climates. Keep an eye out for common pests such as aphids, spider mites, and caterpillars, and take appropriate measures to control them if necessary. Additionally, practice good garden hygiene, such as removing plant debris and weeds, to help prevent the spread of diseases.
While okra is generally resistant to pests and diseases, it’s essential to remain vigilant and take proactive measures to prevent problems before they occur. Common pests that may affect okra include aphids, spider mites, and caterpillars, which can damage plants and reduce yields if left unchecked. Inspect plants regularly for signs of pest infestations, such as distorted foliage, sticky residue, or chewed leaves, and take appropriate measures to control pests if necessary. This may include using insecticidal soap, neem oil, or other organic pest control methods. Additionally, practice good garden hygiene by removing plant debris and weeds, which can harbor pests and diseases, to help prevent problems from occurring in the first place. By staying vigilant and taking proactive measures, you can help ensure a healthy and productive okra crop.